How to rig a quick-release rescue rope on board
Introduction
Hey friend! So, you’re thinking about rigging a quick-release rescue rope on board—smart move. Picture this: someone slips into the water, and in a heartbeat, you need to throw or lower a rope that can detach cleanly once they’re safe. That is why this gear matters.
Have you ever thought, “What if the rope gets stuck with the boat still pulling?” It’s a scary thought, right? Well, rigging a quick-release system means no more tug-of-war with your vessel. It’s practical, reliable, and makes you feel like a total sea pro.
Throughout this guide, I’ll walk you through everything—choosing gear, tying knots that both hold fast and release with a tug, setting it all up so anyone on deck can use it quickly. We’ll even run through real-life stories and expert-tested drills. By the end, you’ll feel totally confident in a rescue scenario.
Ready to dive in?
Understanding the Basics
Key Components
Before we tie anything, let’s break down what you actually need:
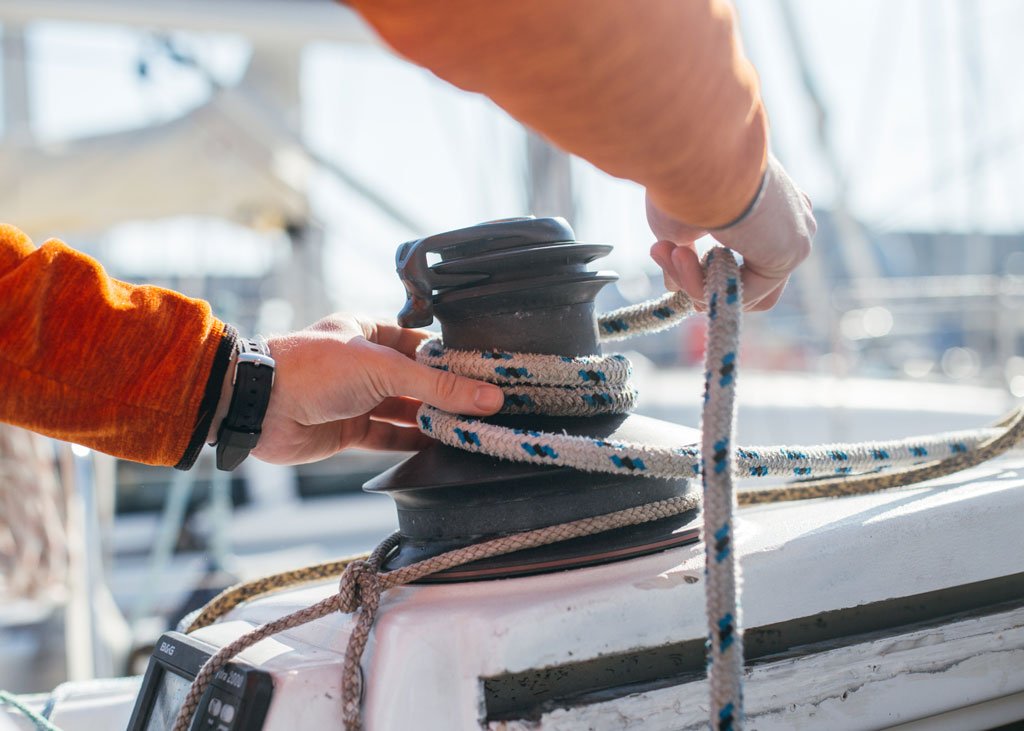
- Rescue rope: typically floating, easy‑to‑grab, high‑visibility line (like polypropylene or a double‑braid with float core)
- Quick-release mechanism: this could be snap shackles, slid‑release knots, or mechanical load‑release hitches
- Hardware: shackles, carabiners, possibly a small pulley or block
- Attachment point: a secure pad eye, strong cleat, or dedicated anchor point on deck
Terminology Made Easy
Let me explain a few terms before we build:
- Standing part: the main line that stays anchored
- Working end: the free end you pull
- Bight: a loop made without crossing rope ends
- Bight release hitch: a knot that releases when you pull its bight
Getting comfortable with those words helps when following knot-tying steps later.
Safety Fundamentals
Let’s be real: mistakes with rope rescue don’t forgive easily. So:
- Choose materials rated to marine conditions (CE/ISO rated)
- Add redundancy: a secondary knot or backup line
- Protect against accidental release (especially under load)
- Practice. Drill. Re‑drill. Drill again.
Planning Your Setup
Okay, before you even grab your rope or tie a single knot, take a moment to plan it out. [conversational phrase] Think of it like laying the foundation before building a house—you’ll thank yourself later.
Assess Your Boat’s Layout and Rescue Zones
Where are people most likely to fall overboard?
Look at:
- Side decks
- Stern area (especially if you fish or launch dinghies)
- Swim platforms
- Cockpit railings
Ask yourself:
- Can you reach over the side easily?
- Is there a clear space to throw a rope?
- Do you have a strong point to rig from?
Pro tip: Rig your quick-release rope somewhere central and visible. Accessibility in a crisis is everything.
Choose the Right Rope
This part matters more than you think. Not all ropes are created equal.
Look for:
- Floating line – Polypropylene is popular because it floats and is bright
- Soft hand feel – Easier to grab when wet
- 10–12mm (3/8–1/2 inch) diameter – Strong, but not too bulky
- Length – At least 50 ft (15m) for a small boat; more for bigger vessels
Avoid old, stiff, or fraying rope. The smoother the action, the quicker the rescue.
Pick Your Quick-Release Mechanism
You’ve got options here, each with pros and cons:
- Snap shackles: super fast to release under load, but can jam if not cleaned regularly
- Slipped knots: tie a secure knot that comes undone with a tug—great for budget setups or backup
- Load-releasing hitches: designed for lowering loads in rescue scenarios (like the Radium Release Hitch)
We’ll go deep on all of these in the next section, so hang tight.
Step-by-Step Rigging Process
Here’s where we get to the fun part—actually rigging your quick-release rescue rope. Don’t worry if you’re not a knot nerd (yet); I’ll walk you through it.
Identify Strong Attachment Points
Look for:
- Deck pad eyes
- Cleats (if not needed for sailing)
- Heavy-duty handrails
- Dedicated anchor bolts
Make sure:
- It’s metal or reinforced fiberglass
- It’s well-anchored to the hull
- It can take a dynamic load (like a person in the water + motion of the boat)
Measure and Cut Your Rope
Use a marine-grade rope cutter or wrap tape around the section to avoid fraying. Don’t eyeball it.
Recommended lengths:
- 50 ft for small sailboats
- 75–100 ft for cruisers and offshore setups
Don’t forget to seal the ends using a flame or heat gun.
Tie a Release Knot (or Add Shackle)
If you’re going the knot route, try one of these:
Highwayman’s Hitch (Fast & Reliable)
- Creates a loop that holds
- Releases with one pull of the free end
- Great for lowering or quick detachment
How to tie:
- Make a loop around your anchor point.
- Fold the rope to form a second loop (the bight) and insert it through the first.
- Pull the working end through the bight.
Voila! Tug the free end = instant release.
Slipped Bunt-line Hitch
- Strong but releases easily
- Great for wet, slippery lines
Tie it like a regular bunt-line hitch, but leave a loop in the last turn to pull and release.
Prefer hardware? Use a Snap Shackle:
- Loop the rope through the shackle’s eye
- Clip onto your anchor point
- Pull the pin or toggle = rope falls free
Perfect for solo sailors or when wearing gloves.
Attach Hardware: Carabiners, Shackles, Snaps
Carabiners: Lightweight, easy to clip, but not all are made for marine use
Stainless steel snap shackles: Durable, rust-resistant
Quick-release pins: Good for heavy-duty rescue gear
Make sure you:
- Inspect for corrosion
- Test the release action with gloves on
- Use locking carabiners to prevent accidental opening
Route the Rope for Easy Access
You want the rope to:
- Be coiled neatly near its anchor point
- Have the free end easily accessible
- Be reachable from the helm or cockpit
Use:
- Velcro loops to secure the coil
- A bag or mesh pouch mounted to the rail
- A color-coded tag to mark the release point
Mechanisms in Detail
This is where the geeky boat stuff meets real-life utility.
Snap Shackles and Quick Links
Fastest. Cleanest. Most sailor-approved.
Use when:
- Under tension (pulling someone from the water)
- You need one-handed release
- You want gear you can trust even after salt exposure
Make sure it’s:
- Marine-grade stainless
- Large enough to release under load
- Oiled and tested every few months
Knots That Release Cleanly
If you want a budget-friendly, elegant setup, knots are your best friend.
Here’s your knot cheat sheet:
- Highwayman’s Hitch: Fast, clean pull
- Slipped Buntline: Compact and strong
- Tumble Hitch: Releases even under tension (ideal for rescues)
- Bowline with Slipped End: Classic and beginner-friendly
Practice these a dozen times. Seriously. [emotion-driven] You’ll feel like a wizard when you pull one and it opens like magic.
Load-Release Hitches (Advanced)
For advanced sailors or rescue pros:
- Radium Release Hitch (used in rescue lowering systems)
- Munter Mule + Overhand combo
- BC Hitch
These setups are amazing for:
- Lowering gear or people from deck height
- Releasing under heavy loads
They take more rope and a little practice, but are super smooth.
Testing & Safety Checks
You’ve set it all up… but will it work under pressure?
Here’s how to be sure:
Do a Dry Run
- Have a buddy wear a harness or hold the end of the rope
- Simulate a rescue while you stand by the release point
- Practice pulling the release knot or pin
Tip: Try it blindfolded or in gloves. You’ll learn what your fingers miss.
Inspect the System
- Check for rope fray, UV damage, salt crust
- Confirm shackles still snap cleanly
- Test the entire setup monthly
Train Your Crew
Even if it’s just your partner or weekend guests:
- Show them the release knot or pin
- Practice as a team (use cushions or a float dummy)
- Talk through steps: who releases, who throws a lifebuoy, etc.
Special Situations & Pro Tips
Let’s get real—conditions aren’t always ideal.
Wet Ropes and Slippery Hands
Use ropes with grip-friendly texture. Add rubber tubing or knots on the end to help with grip.
Solo Sailors, Listen Up
- Rig a rescue line that can be triggered from the cockpit
- Use a snap shackle on a trip line
- Pre-coil and test it weekly
Underwater Releases
For dive boats or emergency towing:
- Use weighted rope ends
- Consider bright, floating line with a grab handle
- Mark the release line with glow tape or reflective c
Maintenance, Inspection & Replacement
Like anything on a boat, your rescue rig needs love.
Make It Routine
- Monthly: Test the release
- Quarterly: Inspect rope, shackles, mounting points
- Yearly: Replace rope if fraying, sun-faded, or stiff
Watch for Enemies
Salt, sun, and time = degradation
- Store rope in the shade
- Rinse with fresh water after sailing
- Replace hardware if rusted or sticky
Keep It Fresh
If your knot memory fades or the rig collects mildew—re-rig it. Practice tying fresh.
Real-World Scenarios & Stories
This is where it hits home.
Overboard Drill Gone Right
One sailor from a Reddit sailing forum shared how their pre-rigged rescue rope with a slip knot saved time during a MOB drill. “It was like second nature—grab, pull, toss.”
Lesson from a Miss
Another skipper lost precious minutes trying to unclip a wet carabiner that had corroded shut. [emotion phrase] “I felt helpless watching the rope tangle just out of reach…”
The Confidence Factor
Setting this up gives peace of mind. You sail knowing you’re not just hoping for the best—you’re ready.
Conclusion
Rigging a quick-release rescue rope isn’t just some fancy trick—it’s a smart, life-saving choice. It tells everyone on board that safety matters.
When you prep for emergencies like this, something changes. You feel more confident, more in control. And if the unthinkable happens? You’ll be ready.
So grab that rope. Try the knot. Clip that shackle.
You’ve got this.
Please read more about the best boat rope.
FAQs
What rope type is best for a rescue rope?
Floating polypropylene or marine-grade double-braid, 10–12mm thick, is ideal.
Can I add a quick-release rope to an existing lifeline?
Yes—use a carabiner or clip system, but make sure the anchor point is solid.
Are knots safe enough, or should I use hardware?
Both work if done right. Knots need practice; hardware needs maintenance. Use what you’re most confident with.
How do I stop accidental release?
Use locking carabiners or secure bight loops that won’t snag. Never rely on loose lines.
How often should I inspect or re-rig?
Test monthly. Replace parts annually or after heavy use.