How to splice a Prusik cord for climbing
Introduction: Why Splice a Prusik Cord?
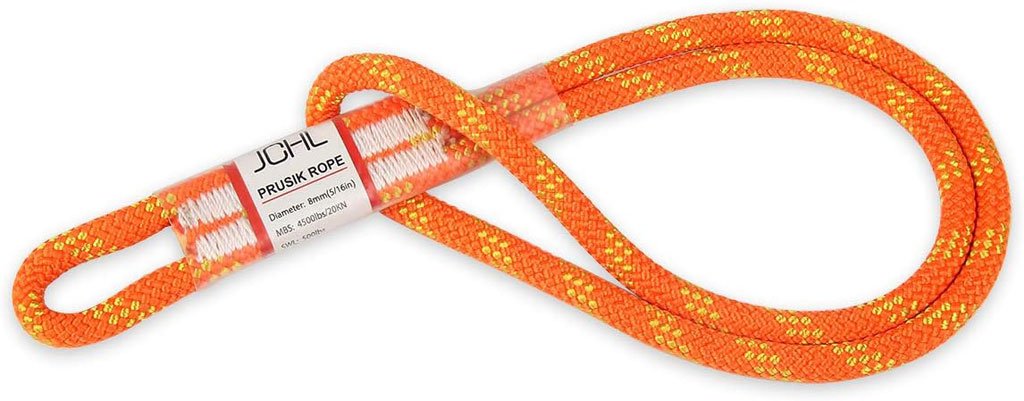
Hey friend! If you’ve ever been out climbing or even just prepping gear, you probably know how important your Prusik cord is. That little loop, used for friction hitches to ascend or back up your rappel, needs to be rock-solid reliable. Now, while tying your Prusik loop with knots like the double fisherman’s knot is common, have you ever thought about splicing your Prusik cord instead?
Splicing offers a smoother, stronger, and more elegant solution. It gives you a loop that feels just right in your hands and works flawlessly when you need it most. In this guide, I’ll walk you through everything—starting from the basics to detailed, step-by-step splicing methods for different rope types. By the end, you’ll feel ready and confident to splice your own Prusik loop and maybe even impress your climbing buddies!
So, ready to dive in? Let’s make your climbing safer, slicker, and a little more fun.
Understanding the Basics: What Is a Prusik Cord?
Before we splice, let’s make sure we’re all on the same page about what a Prusik cord actually is.
A Prusik is a type of friction hitch—essentially, a loop of smaller diameter cord wrapped around a bigger climbing rope. This loop can slide up and down the rope when unloaded but locks tight under load, allowing climbers to ascend ropes, secure themselves, or serve as a backup in rappelling.
Usually, climbers make Prusiks by tying a loop with a double fisherman’s knot or sometimes a triple fisherman’s knot for extra security. These knots work, but the bulk they create and the reduced rope strength are real downsides.
Why Choose Splicing Over Knots?
Strength Retention
Here’s a fun fact: knots reduce the strength of your cord by about 20% to 40%, depending on the knot type. Why? Because the bends and pressure points the knot creates weaken the rope fibers. On the flip side, a well-made splice retains up to 95% of the original rope strength. That’s a big deal when your life depends on it.
Smoother, Less Bulky Loop
Have you ever struggled with a bulky knot snagging on your gear, carabiners, or even your harness? It’s annoying, right? Spliced loops are sleek and smooth, gliding effortlessly through your gear and making climbing easier and safer.
Better Durability
Knots can shift or loosen slightly under repeated use, but splices are structurally integrated into the rope. This means they hold their shape better over time and resist wear more effectively.
Confidence and Craftsmanship
Honestly, there’s a special feeling when you splice your own Prusik loop. It’s a bit like crafting something personal and dependable—a loop that isn’t just a piece of gear but a testament to your knowledge and care. It fills you with this quiet confidence and joy that I’m sure you’ll appreciate once you try it.
Know Your Rope: Types and Materials
Rope Construction Types
Before splicing, it’s essential to understand the rope you’re dealing with because splicing techniques vary:
3-Strand Rope:
This traditional rope is made by twisting three strands together. It’s easier to splice manually and works great for Prusiks. However, it’s less common as a main climbing rope nowadays.
Kern-Mantle Rope:
This modern climbing rope features a strong inner core (kern) surrounded by a woven sheath (mantle). While it’s more complex to splice, it’s very common for climbing applications and offers superior durability.
Braided Rope:
Some cords have a braided construction without a distinct core. Splicing these can be tricky, requiring specific techniques.
Material Considerations
Nylon:
Strong, slightly stretchy, and splices well. Nylon is the traditional material for climbing cords.
Polyester:
More abrasion-resistant and less stretchy. It’s tougher to splice but more durable in the long run.
Dyneema/Spectra:
Extremely strong and lightweight but very slippery and with a low melting point. Splicing Dyneema requires great care.
Aramid (Kevlar):
Heat-resistant and very strong but difficult to splice and less flexible.
Diameter Rules of Thumb
Your Prusik cord should ideally be 60% to 80% of the diameter of your main climbing rope. For example, if your main rope is 10 mm thick, go for a 6 to 8 mm cord. This ratio helps your Prusik slide smoothly but grip securely.
Tools and Materials Needed for Splicing
Okay, let’s talk tools. You don’t need a full climbing store in your backpack, but a few basics help a lot:
Fid or Splicing Needle:
A tapered tool used to open rope strands to weave the tails during splicing.
Marlinspike:
A pointed tool for prying rope strands apart.
Tape:
Useful to wrap ends and prevent fraying during prep.
Sharp Knife or Scissors:
For clean cuts on the rope.
Heat Source:
Such as a lighter or heat gun, to fuse synthetic rope ends to prevent fraying.
Whipping Twine (optional):
Thin thread for binding splice tails securely.
If you don’t have a fid, don’t sweat it—a bent coat hanger or even a sturdy wire can work in a pinch.
Detailed Step-by-Step Splicing Methods
Splicing a 3-Strand Rope
This method is great for traditional 3-strand cords and is the most straightforward splice.
Prepare the Rope
- Cut your rope to the length you want for your Prusik loop (typically 1.2 to 1.5 meters).
- Seal the ends by melting synthetic fibers or wrapping with tape to avoid fraying.
Unlay the Strands
Untwist about 20–30 cm (8–12 inches) of the rope end to separate the three strands.
Form the Loop
Bend the rope to the desired loop size, overlapping the unlaid end with the standing part.
Begin the Tucks
- Take one strand and tuck it under a strand of the standing part.
- Repeat this with the other two strands in sequence, following a specific pattern (usually three to five tucks). The tucks secure the splice.
Tighten and Set
After all tucks are complete, pull on the strands to tighten the splice evenly.
Trim and Secure
- Cut the tails short, tapering them to reduce bulk.
- Optionally, bind with whipping twine or tape to prevent loosening.
This splice looks neat and retains excellent strength.
Splicing a Kern-Mantle (Braided) Rope
Splicing kern-mantle rope is trickier and requires more patience.
Cut and Seal
Cut your cord to length and seal the ends with heat to prevent fraying.
Open the Sheath
Carefully peel back the outer sheath about 15–20 cm. Avoid damaging the core.
Expose and Prepare the Core
Slide out the core rope from the sheath at the cut end. The core will be spliced separately.
Form the Loop
Bend the rope to form your loop size.
Bury the Core
Thread the core back into the sheath, creating a buried splice. This may require a fid or marlin-spike.
Bury the Sheath
Similarly, bury the sheath back into the rope’s body following standard splicing techniques.
Set and Test
Massage the splice and test for smoothness and security.
This method produces a strong, smooth loop but needs practice and patience.
Locking Brummel Eye Splice – A Quick DIY
If you want a quick but strong splice without a fid, the locking Brummel splice is a favorite among climbers who do DIY.
Double the Cord
Fold your cord in half to form a bight.
Form Two Parallel Strands
Lay the two parallel strands side-by-side.
Create the Loop Size
Decide on your loop size and mark it.
Thread the Ends Back
Take the tail ends and thread them back through the loop, locking them in place.
Pull Tight and Test
Tighten the splice and test with weight.
This splice keeps your loop secure with minimal bulk and can be done without specialized tools.
Safety Checks and Testing Your Splice
After splicing, safety is everything.
Inspect the Splice: Look for loose strands, uneven tucks, or lumps.
Test with Weight: Gently load the splice using body weight or a small load before climbing. This helps the splice settle.
Massage the Splice: Work the strands into place to tighten the splice evenly.
Regular Inspections: Before every climb, check your splice for wear or slippage. Retire or redo the splice if any issues arise.
Tips, Tricks, and Common Mistakes
- Always seal your rope ends before starting to avoid fraying.
- Don’t rush your tucks—quality matters more than speed.
- Measure twice, cut once! A too-short Prusik loop can be a hassle.
- If you’re new, practice on spare rope before splicing your actual climbing cord.
- Avoid splicing dynamic climbing ropes as a loop for critical weight-bearing applications—use static cords designed for Prusiks.
- Use whipping twine or heat shrink tubing to secure tails neatly.
Real-Life Stories: What Climbers Say
Many climbers have shared their experiences online, emphasizing how splicing their own Prusik loops transformed their climbing gear:
- “Splicing was intimidating at first, but once I got the hang of it, it made me feel like I had total control over my gear.”
- “Switching from knotted loops to spliced ones made a huge difference — the splice slid better and felt much stronger.”
- “I love that I can fix and customize my loops on the fly without buying expensive pre-made ones.”
It’s not just about the technical benefits—it’s about empowerment, confidence, and a deeper connection with your gear.
Conclusion: Your Splice, Your Confidence
Wow, that was quite a journey! From understanding why splicing matters to mastering the detailed steps for different rope types, you’re now equipped to make your own strong, smooth Prusik loops. This skill not only boosts your gear’s performance but also gives you that special feeling of craftsmanship and safety that every climber cherishes.
Next time you hit the crag or the gym, you’ll know your loop is more than just a piece of cord—it’s a reliable partner, silently supporting your adventure.
Ready to give splicing a go? Remember, patience and practice are your best friends. And if you mess up, it’s totally okay—just start again! Your safety and confidence are worth every careful tuck.
Happy climbing, and may your splices always hold tight!
Please read more about the best prusik cord.
Frequently Asked Questions (FAQs)
Can I splice any type of climbing rope for a Prusik loop?
A: It depends on rope construction. Three-strand ropes are easiest, but kern-mantle ropes can be spliced with care. Always use static or accessory cords designed for Prusik use, not dynamic climbing ropes.
How long should my Prusik loop be?
A: Typically, between 1.2 and 1.5 meters total length, but this depends on your climbing style and application.
Is a spliced Prusik loop safer than a knotted one?
A: Yes. Splices retain more strength, are smoother, and less likely to snag or fail under load.
What tools do I absolutely need to splice a Prusik?
A: At minimum, a sharp knife, tape, and something to open strands (a fid or improvised tool). Specialized tools help but aren’t always necessary.
How often should I inspect or replace my spliced Prusik?
A: Inspect before every climb. Replace if there are signs of wear, fraying, or any damage that compromises safety.